
Step 1: Pre-Structure Planning & Strategy
The first step is setting up a foundation for success, we always refer back to the 5 P's, proper planning prevents poor performance.
- Define your ideal customer’s top 3 objections/needs (price, quality, trust).
- Design an offer suite based on your ideal buyer (bundle, discount, guarantee) that you’ll highlight in the Buy Box.
- Compile 3-5 competitor pages which are on similar journeys. (business goals, budgets, desired results)
Step 2: Hero Section (Above-the-Fold) & First Impression
- Use high-quality main images: big, clear, zoomable, multiple angles/lifestyle.
- Create a product title that’s clear, keyword-rich: Brand + Key Feature + Variant.
- Immediately show star rating, review count, and trust badges (secure checkout, free returns).
- Preload page on the best offer for your targeted customer.
- Include testimonials and social proof
- Use all available space.
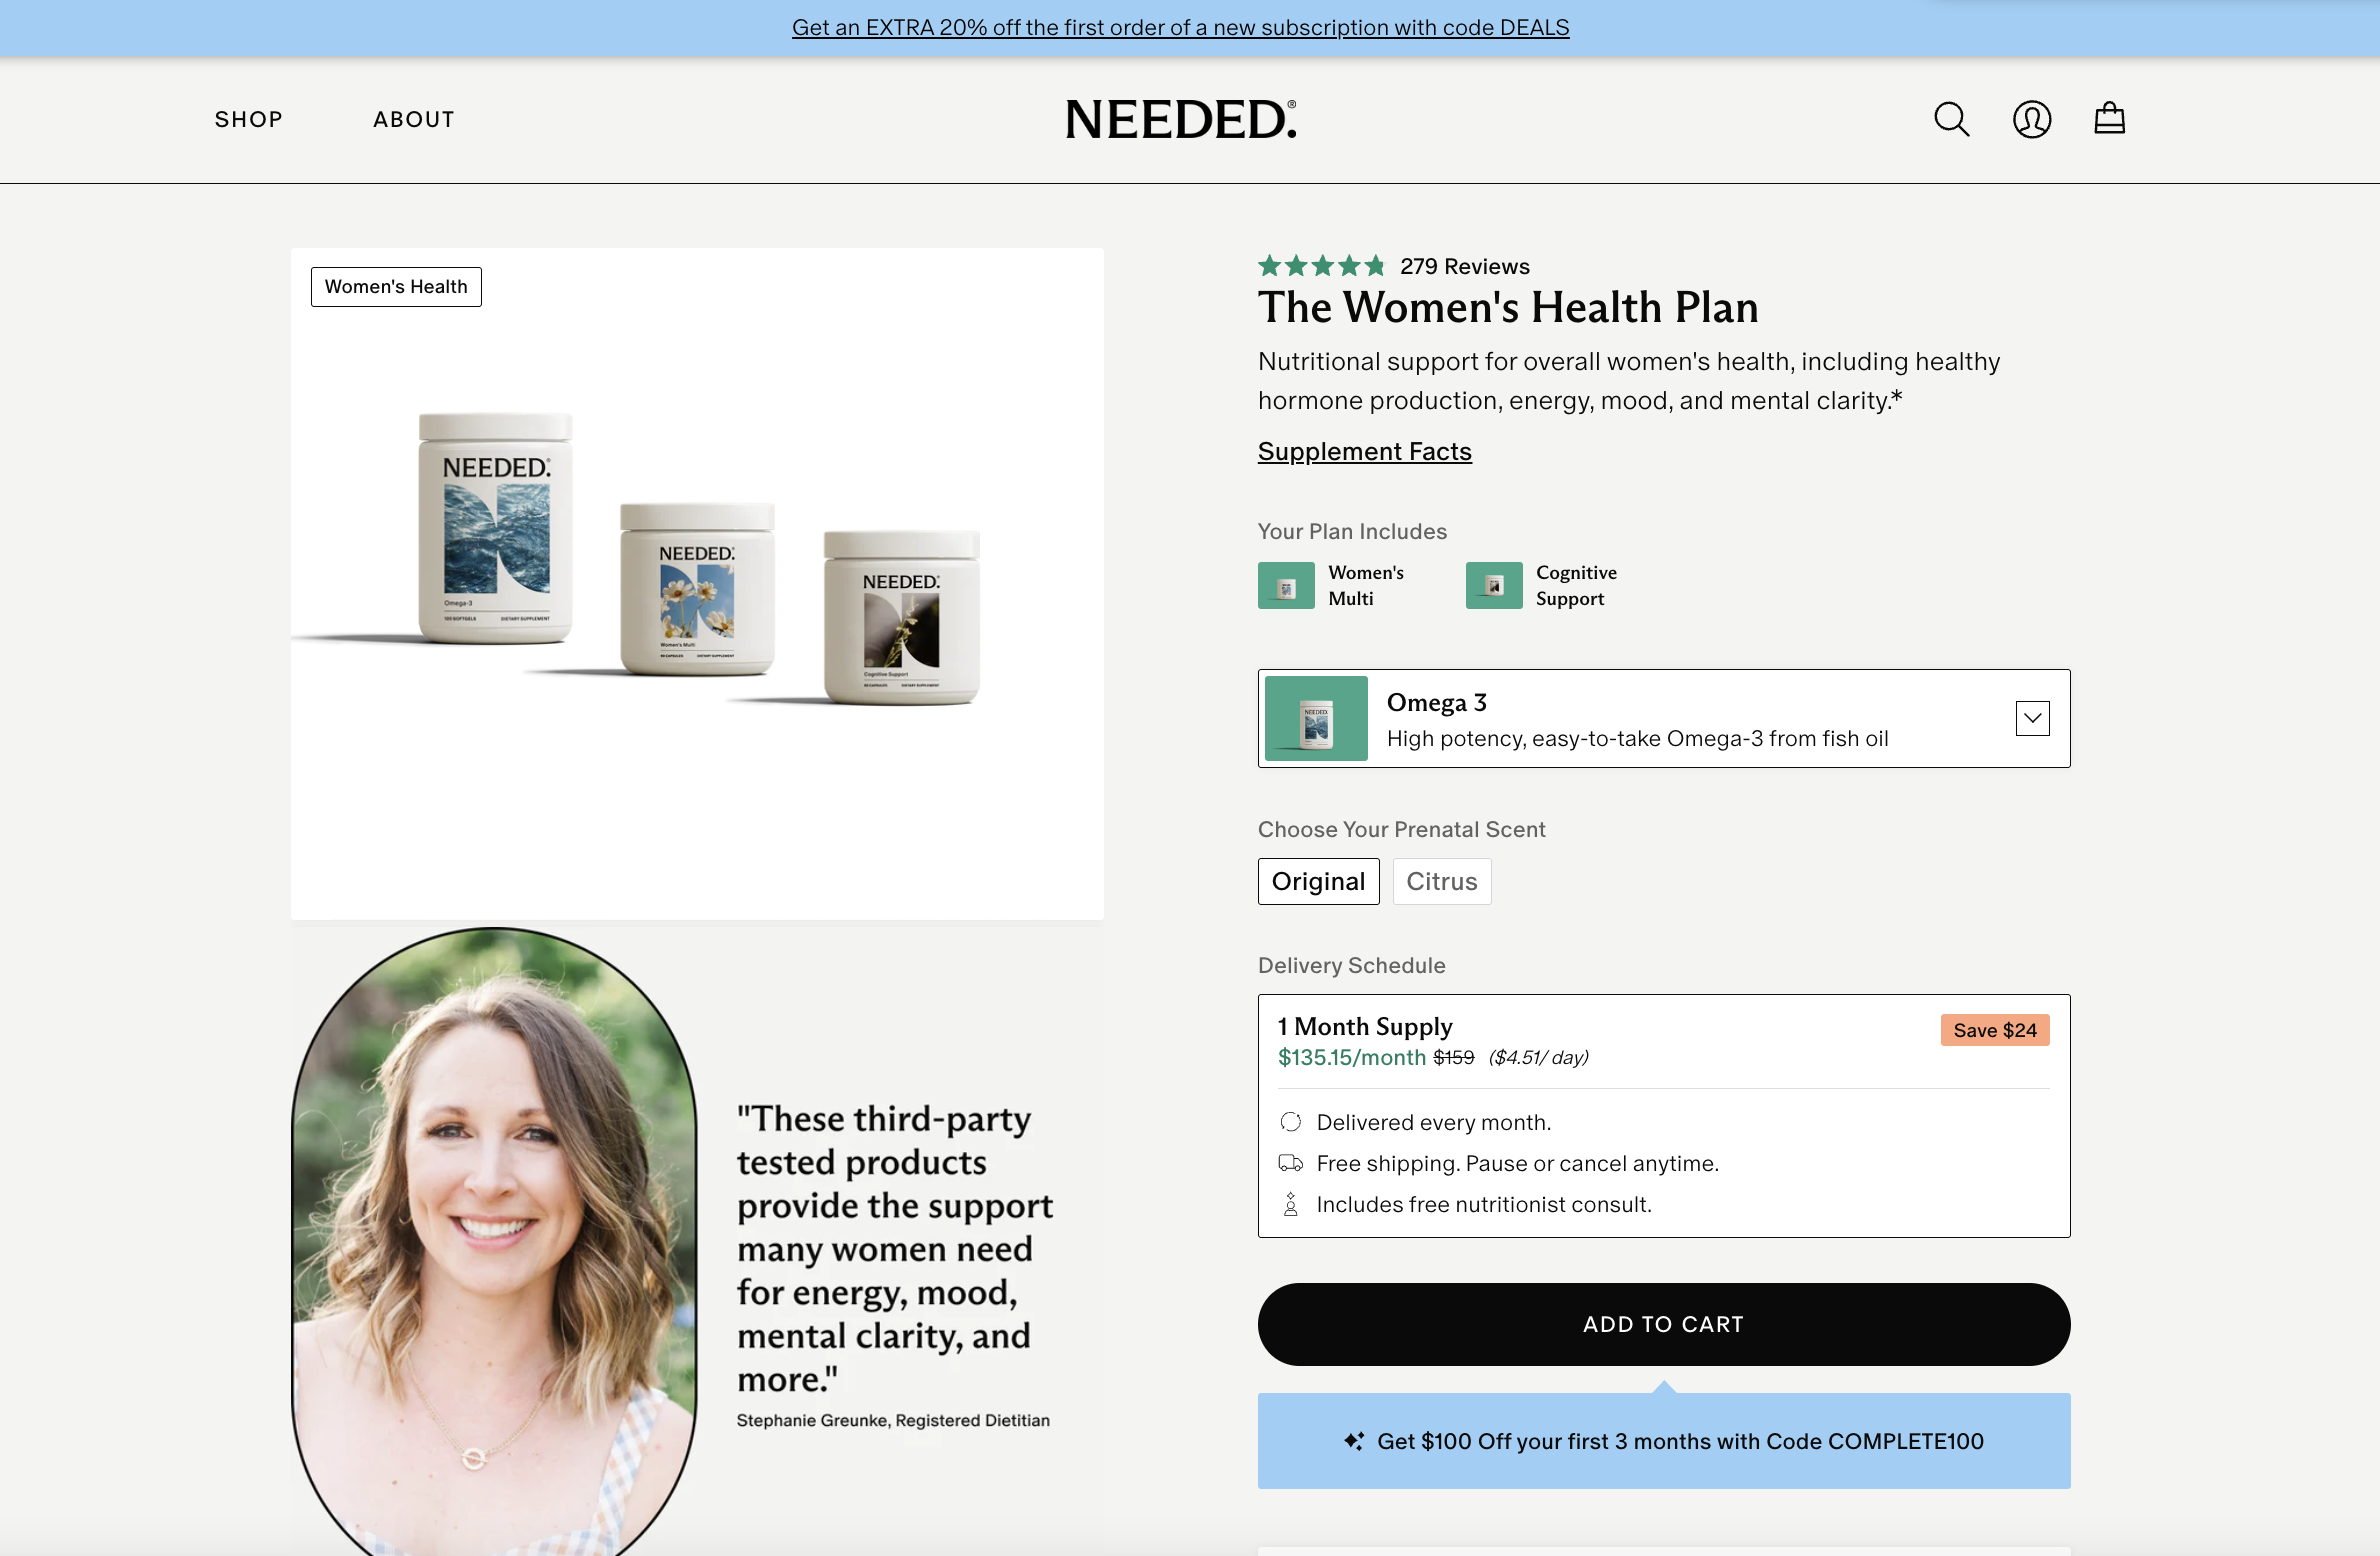
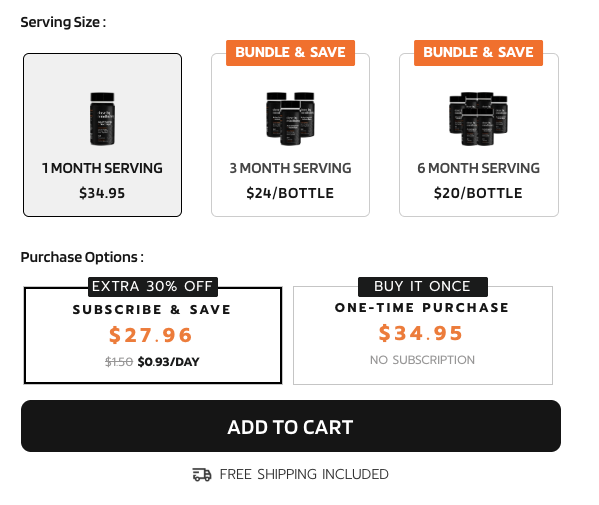
Step 3: Optimize the Buy Box Itself
The Buy Box is the conversion engine. Key elements:
- Price + Savings: Show original price struck out + discount, or “You Save $X / X%.”
- Primary CTA: Big, high-contrast “Add to Cart / Buy Now” button.
- Variant/Option Selectors: Size, color, quantity—all intuitive, mobile-friendly.
- Scarcity / Urgency Cues: Offer expires, limited time offer, limited amount of bundles, exc.
- Guarantees & Trust: Money-back, secure checkout, “Ships in 24 hr,” icons for accepted payments.
- AOV or LTV focused: focus your traffic towards your highest LTV or AOV product offerings. ie: 3 month subscriptions
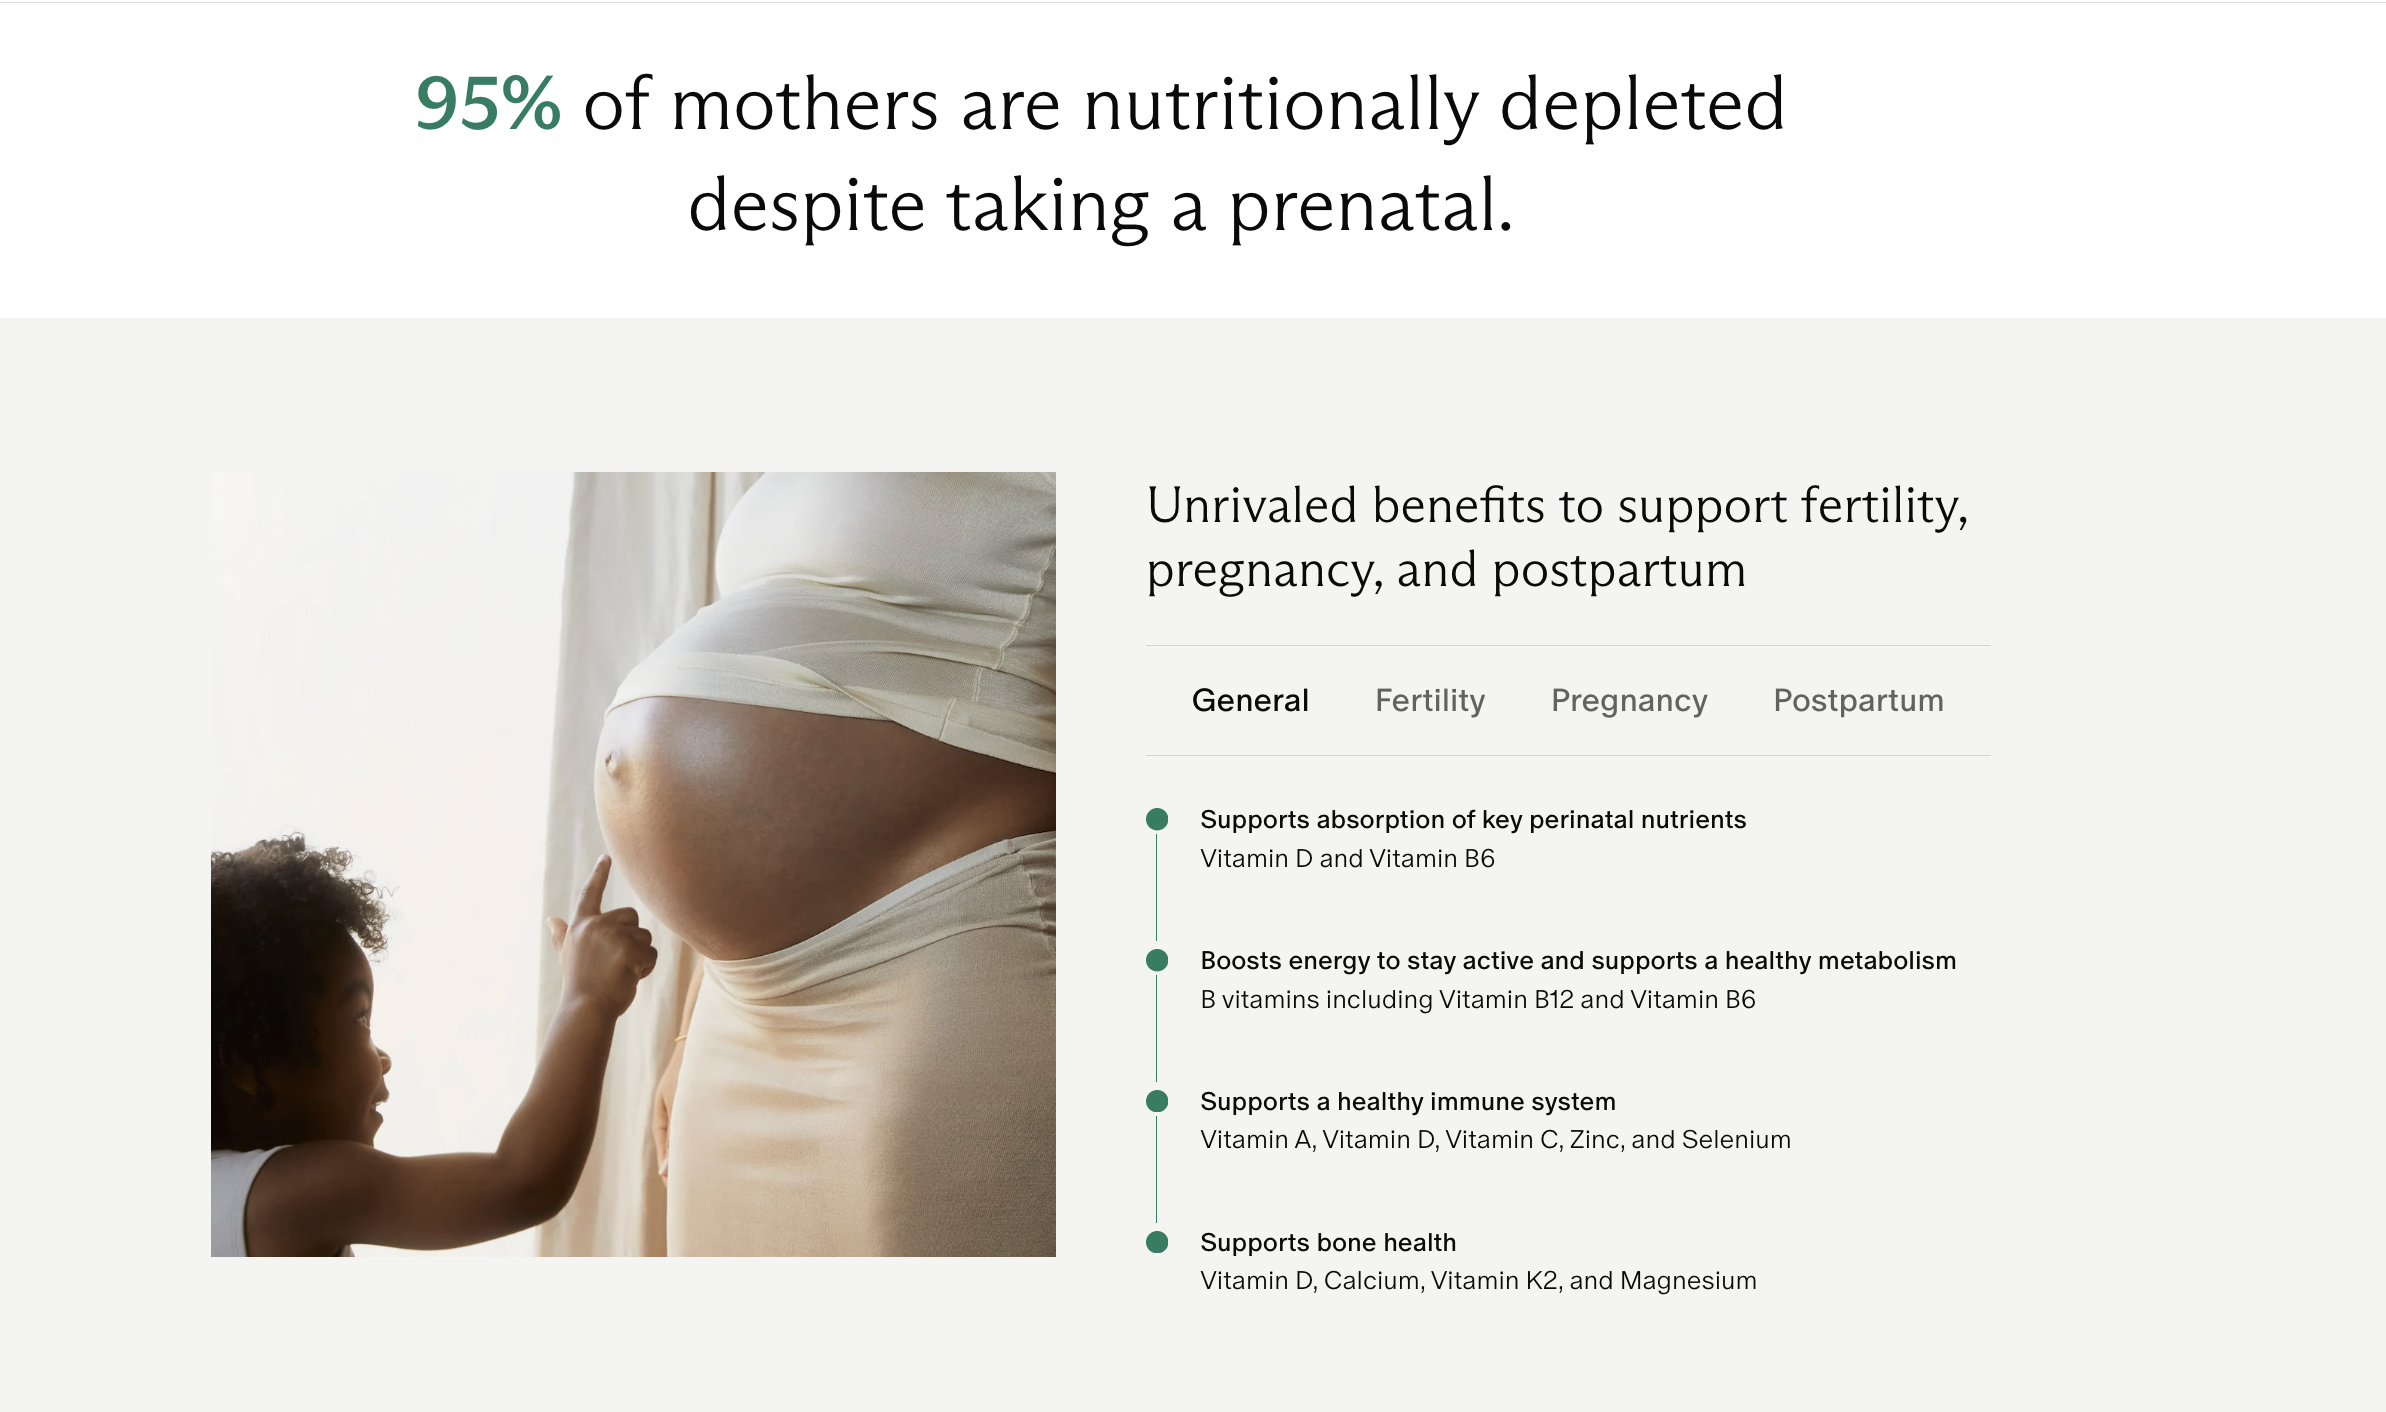
Step 4: Key Benefits & Bullets Close to Buy Box
- Immediately below or beside the Buy Box, list 3-5 benefit-driven bullet points (not just features).
- Use these to address key customer pain points (ease of use, durability, support, speed).
Step 5: Deeper Content Below the Fold
- Story / Use Cases / Lifestyle Content: Show how customers use it in real life.
- Bold Claims: Highlight what your product accomplishes for your target audience
- Technical Specs / Dimensions / Materials in a clean table.
- Comparison / Alternatives (if relevant).
- Video demos / how-to usage: Embedded product video or GIFs.
- FAQs: Anticipate and answer common questions.
Step 6: Trust & Reassurance Boosters
- Free Shipping & Returns: Clearly state them.
- Warranty / Guarantee messaging.
- Full review section: Show star rating breakdown, individual reviews (text + images).
- Secure checkout icons / SSL / payment logos.
- “As featured in” or media badges (if any).
- Contact / support access (chat, phone, email) visible.
Step 7: Mobile & UX Optimization
- Keep Buy Box sticky (remaining on screen) as user scrolls (especially on mobile).
- Ensure buttons are large/tappable and UI spaced well.
- We design our PDPs to be mobile first.
Step 8: Upsells, Cross-Sells & After-Purchase Flow
- For single products and non subscriptions, we like upselling to bundles which include that product.
- For single SKU, we like upselling to subscription or buy more save more offers.
- For increased AOV, we like one click add ons under the buy box.
Step 9: Testing, Tracking & Iteration
- Use A/B testing for headlines, CTA color/text, layout variations.
- Track metrics: Add-to-cart rate, conversion rate, bounce rate, scroll depth.
- Monitor heatmaps (mouse/scroll) to see what users interact with.
- Iterate monthly or quarterly, based on data.
If you want to learn more about how we build high performing PDP's to supercharge ecommerce growth, or are interested in our team doing a thorough audit for your store schedule a call directly using this link. Our agency offers a risk free 15 day trail to ensure perfect alignment.